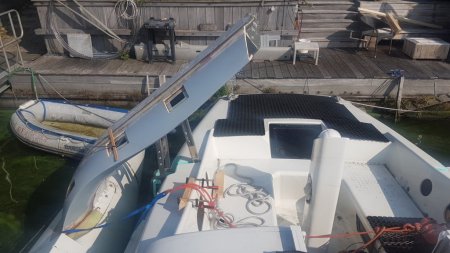
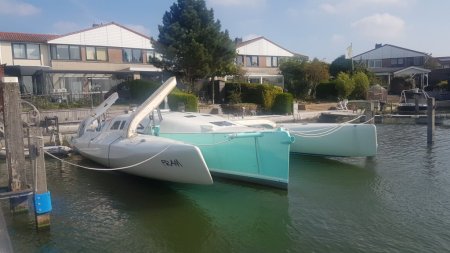
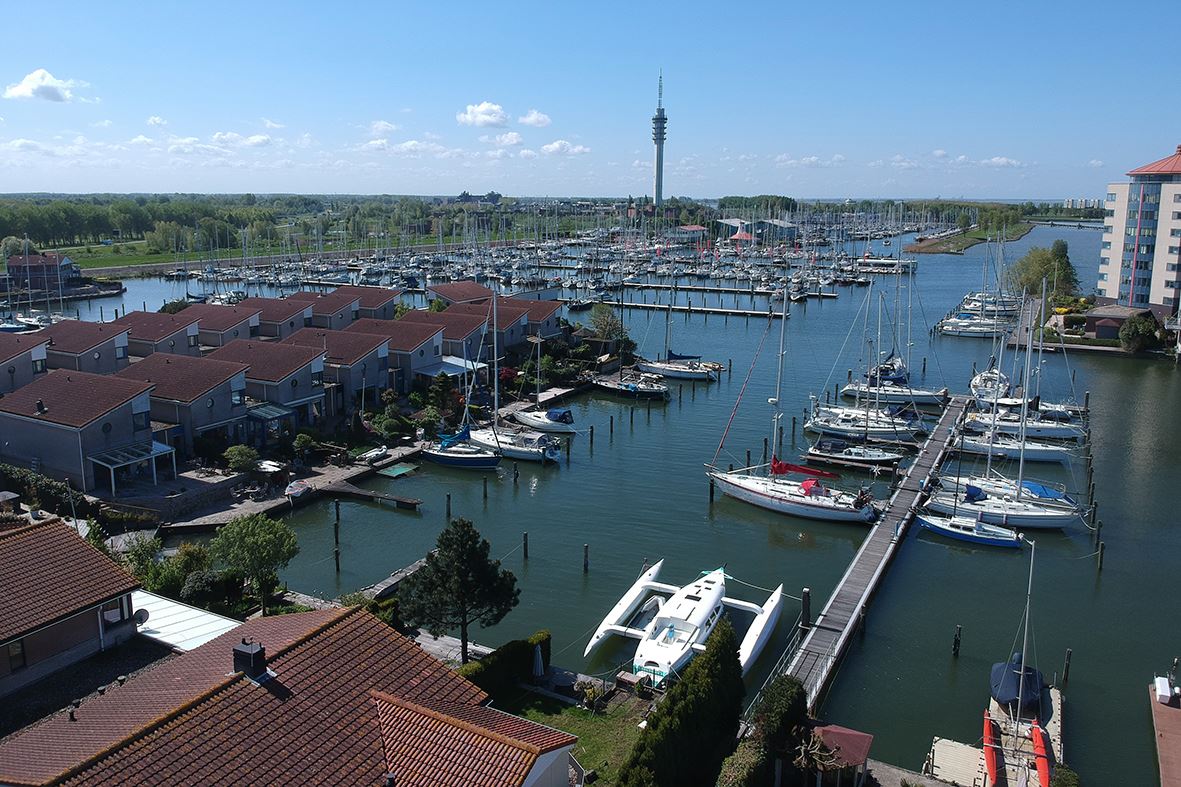
First time folding in the water.

September 23, 2020

With makeshift folding equipment by the absence of sheet winches and a mast.

A lever for the first vertical movement.

photo65

Chain hoist for the movement of the float.

photo67

photo68

photo72

From here in the photo album you can find new photos about the making of the beam fairings and mounting to the beams..


Three hulls coming together.

February 14, 2018

Three hulls coming together in three exciting moments.

The first one, aligning the lower folding struts with each other and in square relation to the mainhull. The distance difference between the for and aft lower folding strut at the inner end and the outer end is 6mm. on Starboard and 2mm. on Port. This means that the alignement of the carbon folding anchors in the mainhull is quite good. A great achievement and kind of reassuring for the next steps.

20171202_175552_450

The second one, first trial of the folding system. It works great !

FoldingAnimation

The third one, the final assembly of my trimaran. The transformation of three hulls and four beams into a boat is the climax of the construction. Finally everything comes together and leads to the trimaran I dreamed of. It is definitely a highlight of the construction so far. Although seeing her full beam for the first time is a bit intimidating …

20180127_150504_450

You can find much more photos in this gallery.

And this and this video on my youtube channel


Insufficient attention in the class ?

October 3, 2017

First of all, thanks to the other F36 / F39 builders who have gone through the same process and published their learned lessons. I was convinced that I would not step in the same traps.

Now I know better. Pride comes before the fall.

Lessons learned, stay sharp also at the end of a long building project.

20170806_160438_450

Using the outer ends of the beams as a mold for making the beam sleeves is not very difficult, I made them with vacuum bagging, but releasing them from the beam outer end is another story. I was warned by the experience of other builders who had great difficulties with releasing the sleeves. This helps me a lot executing a well proven releasing procedure to lever off the beam bolt. So I made some wooden beams and placed them over the beam bolt nut with a big washer in between. Connection with the sleeve is with two layers of  (left over)  carbon UD. I prepared the beam outer ends with 5 layers of a mold release wax. I have used this stuff before and had not difficulties with it ……

20170809_182658_450

However, somewhere in this process or in my thinking I made a big mistake and my worst nightmare has become true. The sleeves did not want to loosen. Even with a very brute force they are not prepared to separate from the beam. Of course there is always a plan B, but damn, this feels like a loss. I ended up with making a cut in the underside of the sleeve giving space for some wedges. All four sleeves were more or less glued to the beam at the same spot, the edge between underside and outer end. Coincidence ? or has anyone a smart conclusion …

20170809_202846_450

In retrospect, the preparation with the mold release wax was not good enough. Did I forget this edge ? did I forget it five times ! (I’m not surprised at anything) or should I have used a PVA release agent in addition to the wax. Or using packaging tape in addition to the other mold release stuff which gives then two chances as the tape itself is also able to release. I don’t know. What I do know is that the approach of the four beams at the same time did not prove very clever for such a delicate work. There is no way to adjust the technique and make improvements in the meantime.

20170811_172517_450

What I do know now is that plan B is not a big deal and is a good solution for quick builders. Thus not worth a nightmare 😉

Pffff, a huge relief.

More photo’s of this adventure are here.


Post-curing the beams.

October 2, 2017

The slow hardener of Ampreg 21, which I used to build the full carbon beams, likes to be post-cured at a moderately elevated temperature of 50 degrees Celsius during 16 hours. To do this I have built an insulated box heated by a simple blow heater.
20171001_112559_450
Start making the box and support for the four beams.
20171001_122937_450
Positioning the beams.
20171001_130148_450
Finishing the box.
20171001_133622_450
Post-curing in progress.


YES! The Beams are finished.

July 28, 2017

At least structural, which is a great relief. Since my last post in May I’ve spent 570 hours in building these full carbon things. Including the build hours  before May I’ve spent a total of 630 in building the Beams. That is besides my day job.

That being said, I had to introduce myself to my wife again 😉

So, I’m in a hurry because the launch of Fram is now coming seriously in sight.

However, the good progress of construction remains bad for the updates of this website. Hope you understand that.

Have a look at the photo galleries, Beams Interior and Beams Exterior

20170725_091932_450


First beam interior finished

May 7, 2017

First of all my apologies for my silence here lately. I am just too busy with getting my boat finished to publish regular updates.

However, last week I reached another milestone. The first beam interior has been finished and the second is also progressing very well. That sounds not very spectacular but for me it is a big step forward as I was very much  looking against it.

The photo gallery of the beam interior has been updated with a lot of new photos so please have a look.

20170430_143451_450


Dangerous mood

September 14, 2016

After such a long construction period one must be careful not to make any shortcuts. It remains necessary to keep thinking about the things you do. So, what is wrong in this picture ?

dsc00070_450

This is the vacuum bag around the final laminate of one of the carbon beam anchors. Rule nr. 1 in vacuum bagging is to put no other parts in the bag except the epoxy laminate. And certainly not a rotatable shaft and bearings that needs to be dismantled again. What a stupid mistake. The epoxy has glued everything firmly together. D!#$* it was a hell of a job and only with brute force, an angle grinder and a hot gas flame the temporary shaft gave up his firmly connection with the carbon anchors.

The image below shows how it has to be done and this experience has put me back on earth again.

dsc00075_450

Anyhow, at the end I have 4 beam anchor assembly’s ready to put in the beams. And yes, that means I’ve finally started the build of the beams. More about that later.

dsc00090_450


Main hull upright, a milestone again.

June 4, 2012

Long time no update. Don’t worry, I’m just very busy. I have the flu at the moment and, while very awkward (but getting a little better right now 🙂  this gives me the opportunity to update some things here and in my website www.fram.nl

Click for photo galery

Turning the main hull upright is once again a milestone in the project after which a new phase in the build starts. Farewell strong back, the base construction on which all the hulls has been build, is now demounted in little pieces and removed to the dumpster. With my four electrical winches under the roof of the workshop, the actual turning went flawlessly. Of course I did it alone and, to continue to fully concentrate, without prying eyes of others. With some extra ropes and the back-up of the workshop crane I took enough safety precautions to avoid any risks.

For the support of the hull in the next phase of the build I’ve build two mobile boat stands. For the subsequent assembly of the mainhull and the two floats the boat have to be more or less moveable without too much of a hassle. I used the hull as the mold for the two boat stands. Click here or in the moving photo above for the photo galery.

There are some new photos in the upside down interior work galery.

and I’ve started with a new chapter about building the beams.


Preparations for the construction of the beams.

December 11, 2011

For this winter I have planned to build the four beams in my garage at home. De beam molds are ready and one of the first parts I need are the upper folding strut recess sides. These are made of pre-made 4mm. thick solid laminate. For the eight pieces and some smaller doublers I vacuum infused a 4’x6′ solid laminate plate.

The low viscosity epoxy resin starts to gel after 300 minutes so there is enough time for a simple version of the infusion setup. Below three photos of the infusion, the first after 15 min, than 1 hour and the bottom one after 1.5 hour.

15 min. after start of infusion1 hour after the start of the infusion1.5 hour after the start of the infusion

There are also some new photos in this galery.